Most kids’ bedrooms don’t suddenly become messy overnight — they slowly stop working as your child grows. Furniture gets added, habits change, and before long, the room feels cluttered, awkward to clean, or just not suited to their stage of life anymore.
The good news is you don’t need to buy storage solutions or redecorate to fix it. A simple bedroom reset — decluttering what’s no longer used, deep cleaning the hidden areas, and rearranging the layout — can completely change how the space feels.
In this step-by-step guide, I’ll walk you through exactly how to declutter and reset a kid’s bedroom so it’s easier to clean, more functional to use, and better suited to how they live right now.
You can follow along one step at a time, whether you’re tackling a full room overhaul or just making a few practical improvements.
Even small changes can make a bedroom feel calmer, more organised, and much easier to maintain.
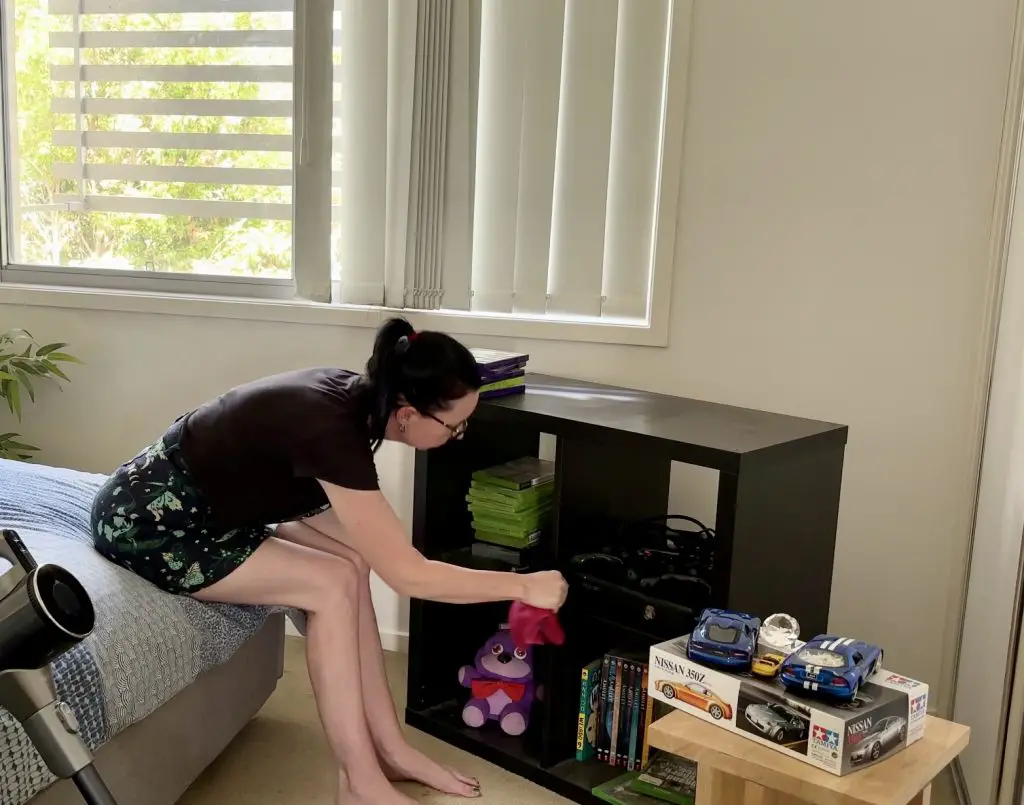
Watch: Decluttering & Deep Cleaning a Kid’s Room
Need some inspiration?
Come along with me below as I declutter, clean and reset my son’s bedroom. 👇
Step 1: Remove Anything That Doesn’t Need to Be in the Room
Before you start decluttering shelves or organising drawers, begin with the biggest, most obvious wins.
This step is about removing anything that simply doesn’t need to live in the bedroom at all. These items often take up the most space, collect the most dust, and make the room harder to clean and move around in.
Starting here makes everything else easier. Once bulky or unused items are gone, the room instantly feels lighter, and it becomes much clearer what actually needs organising.

Look for the Big Impact Items First
Focus on anything that:
- Isn’t being used anymore
- Takes up valuable floor space
- Makes cleaning harder
- Belongs somewhere else in the house
These are often the items that quietly become part of the background, even though they no longer serve a purpose.
Common examples include:
- Unused TVs or gaming setups
- Furniture that no longer fits the layout
- Extra chairs, cabinets, or shelves
- Broken or outdated electronics
- Storage units holding random overflow items
Removing just one large item can completely change how the room feels and functions.
Ask One Simple Question: Does This Still Need to Live Here?
Instead of overthinking every item, keep your decision-making simple.
Ask yourself:
- Is this used regularly in this room?
- Does it support how the room is used now?
- Would it make more sense somewhere else?
- If this wasn’t already here, would I put it here today?
If the answer is no, it’s a strong candidate to remove.
Remember, this isn’t about getting rid of everything — it’s about making sure the room reflects your child’s current needs, not how it was used years ago.
Create Three Quick Categories
To avoid decision fatigue, sort items into three simple groups as you go.
If you have three boxes or baskets handy to keep these categories together and organised, that can also be helpful.
The 3 categories:
- Move elsewhere in the house – still useful, just not here
- Donate or sell – no longer needed but still usable
- Rubbish or recycle – broken, outdated, or unusable
This keeps the process moving and prevents piles from building up on the floor.
🌿 GENTLE REMINDER 🌿
This step isn’t about creating a perfectly styled bedroom.
It’s about clearing the space so it can work better for everyday life.
Even removing one or two items can make a noticeable difference.

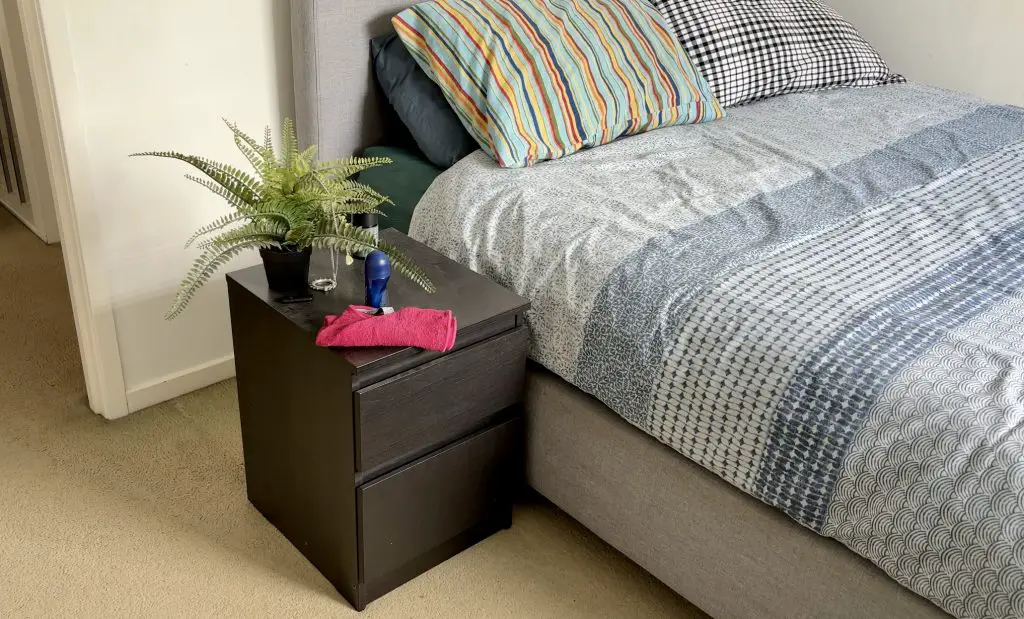
Step 2: Declutter What’s Left
Once the obvious items have been removed from the room, it’s time to work through what remains. This step is about clearing out the smaller, everyday clutter so the room reflects how it’s actually used now — not how it used to be.
At this stage, you’re not organising yet. You’re simply reducing what needs to be managed. The less that stays in the room, the easier it will be to clean, arrange, and maintain later.
Work Surface by Surface
Rather than bouncing around the room, focus on one area at a time.
One section at a time:
- Bedside table
- Desk surface
- Shelves
- Drawers
- Wardrobe section
- Floor corners or under-bed storage
Finishing one small space before moving on keeps the process calm and prevents half-done piles from building up.
Use a Simple Decluttering Filter
For each item, run through a quick mental checklist:
- Is this still used regularly?
- Does it still fit their age or interests?
- Would they notice if it disappeared?
- Does it belong somewhere else in the house?
If the answer is no, it’s probably safe to remove.
Try to keep decisions practical rather than sentimental. Bedrooms function best when they hold what’s actively part of daily life, not everything that’s ever been owned.
Common Things to Watch For
Kids’ and teens’ rooms tend to collect the same types of clutter over time.
Keep an eye out for:
- Clothes that no longer fit or get worn
- Old school papers or projects
- Broken gadgets or cables
- Random packaging or empty boxes
- Duplicate items (multiple drink bottles, notebooks, etc.)
- Hobby items they’ve outgrown
Removing all of these can free up far more space than you realise.
Use the Three Sorting Categories
As with Step 1, avoid overcomplicating decisions by using just a few categories for getting rid of stuff.
Three sorting categories for items that are going:
- ‘Rehome’ – needs to go somewhere else in the home
- ‘Rubbish/Recycling’ – broken, no longer useful, or trash
- ‘Donate’ – still useful, can be passed on to someone else
You don’t need a perfect system — just enough structure to keep moving forward.
🌿GENTLE REMINDER 🌿
You don’t need to empty every drawer or make ruthless decisions.
Even small reductions can make the space feel noticeably lighter.
The goal is simply to make the room easier to live in, not perfectly minimal.
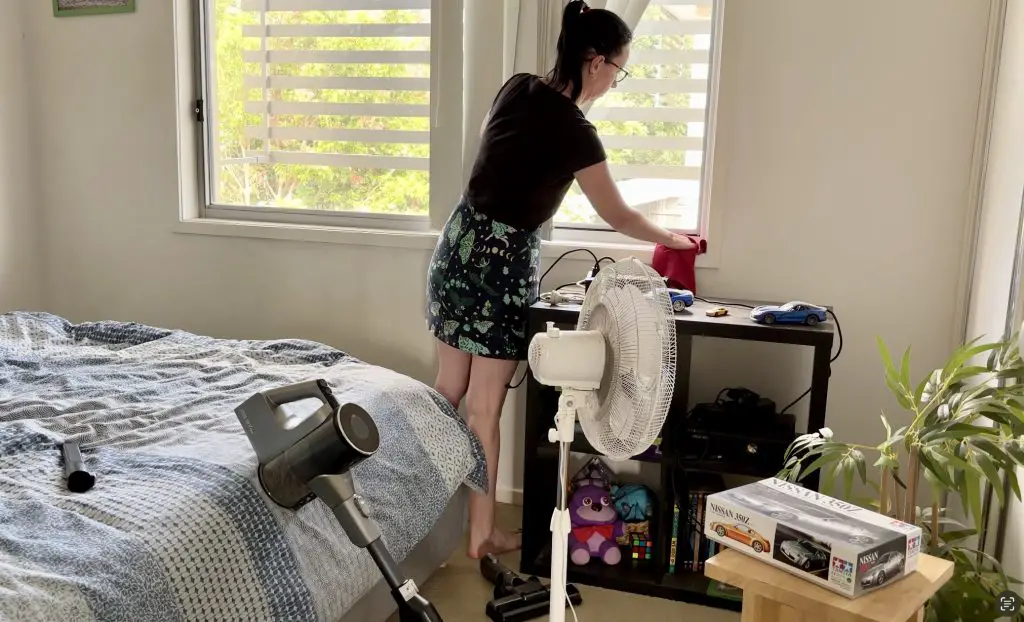
Step 3: Strip the Room Back for Cleaning
Now that you’ve removed what doesn’t belong and decluttered what’s left, this step prepares the room for a proper clean. Instead of trying to dust and vacuum around obstacles, you’re creating clear access to the areas that usually get skipped.
This is what turns a normal tidy into a true reset. When surfaces and floors are clear, cleaning becomes faster, more thorough, and far more satisfying.
Clear the Floor First
Start by lifting anything sitting directly on the floor so you can clean without weaving around objects.
This might include:
- Laundry basket or loose clothing
- Rubbish bin
- Bags or backpacks
- Sports gear
- Storage tubs
- Shoes or slippers
- Art & craft items
Place these temporarily in the hallway or another room so the bedroom floor is as open as possible.
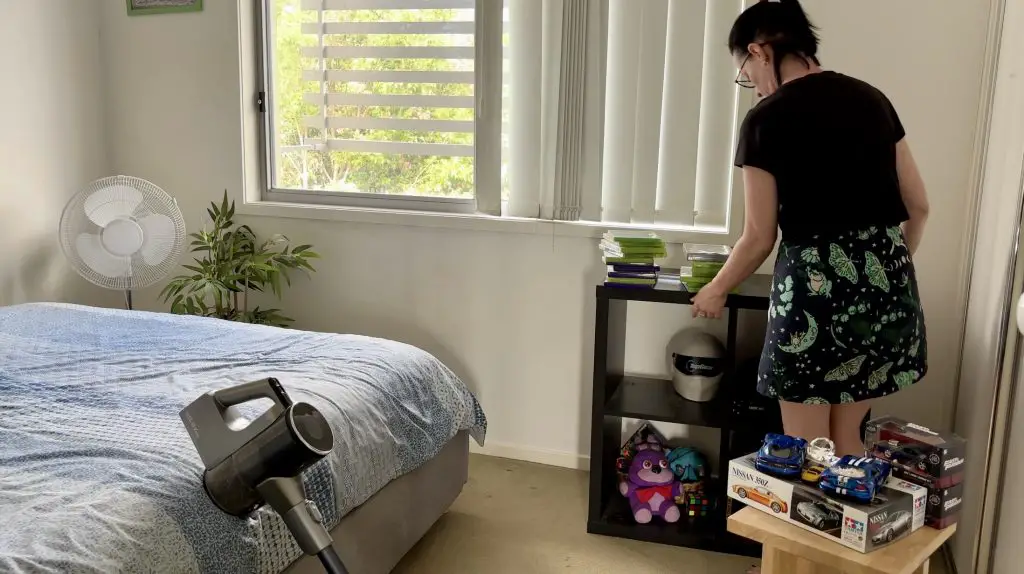
Create Access to Hidden Areas
Next, make space to reach the areas that tend to collect dust over time.
If possible:
- Pull the bed slightly away from the wall
- Slide bedside tables out
- Move lightweight furniture forward
- Clear under-bed storage containers
- Lift items off low shelves
You don’t need to empty the entire room — just enough to reach behind, underneath, and around furniture.
Remove Soft Items for Washing & Cleaning
Before you start cleaning surfaces, gather anything that could benefit from a wash or shake out.
Soft items to remove for cleaning:
- Bed linen
- Pillowcases
- Throws or blankets
- Soft toys that need washing
- Curtains if they’re due
- Rugs and floor coverings
Throwing a load of washing now and getting it dried means everything will be fresh and ready to return once the room is clean.
Shake out any rugs and throws so that they’ll be ready to go back in at the end.
Empty Rubbish and Laundry
This sounds small, but it makes a big difference.
- Empty bins completely
- Collect stray laundry
- Remove food wrappers, drink bottles, or papers
Clearing these first prevents them from being shuffled around during the clean.
🌿 GENTLE REMINDER 🌿
You don’t need to turn the room upside down.
Even pulling out a few key pieces of furniture and clearing the floor can make a noticeable difference.
Step 4: Deep Clean the Room
Now that the room is cleared and decluttered, it’s time for a proper clean. This is where the room really starts to feel fresh, calm, and reset.
Deep cleaning goes beyond a quick tidy — it tackles the dust, dirt, and overlooked areas that make a space feel less comfortable and stagnate the energy.
Start from the Top and Work Down
Cleaning systematically ensures you don’t just move dust from one place to another.
- Ceiling fans or light fittings: Dust or wipe down any fixtures overhead.
- High shelves or wardrobes: Remove items and wipe the surfaces.
- Walls and corners: Check for cobwebs, dust, or marks.
By starting high, gravity does some of the work for you — dust falls downward, ready to be vacuumed or wiped later.
Dust Furniture and Surfaces
Go over all surfaces, including the ones often overlooked:
- shelves and bookcases
- bedside tables
- window sills
- skirting boards and door frames
- any decorative items
💡 Tip: Use a dry microfiber cloth or a damp cloth to trap dust rather than just moving it around.
Vacuum and Clean Floors
With the furniture moved back slightly and the floor space cleared in Step 3, vacuuming will be easier.
- Vacuum under the bed and behind furniture
- Pay attention to corners where dust collects
- Mop or sweep hard floors if applicable
This step immediately brightens the room and removes hidden allergens.
Clean as You Go
While wiping surfaces or moving furniture:
- Check for spots you might have missed
- Quickly dust or vacuum areas revealed as you move things
- Empty bins and remove any lingering clutter
This keeps the process smooth and ensures nothing gets skipped.
🌿 GENTLE REMINDER 🌿
You don’t need to make the room sparkle like a showroom.
Focus on the areas that matter for everyday life.
Step 5: Rearrange the Room
Once the room is clean and fresh, it’s time to think about how the space is actually used.
Rearranging furniture and belongings isn’t about style or perfection — it’s about making the room easier to live in, easier to maintain, and more comfortable for your child’s current needs.
Start with the Big Pieces
Begin by considering the main furniture:
- Bed placement: Make sure there’s enough space to move around and clean underneath.
- Desks or study areas: Should be near good lighting and away from heavy foot traffic.
- Storage units or dressers: Place where they are accessible but don’t block pathways.
Moving these key pieces first makes it easier to adjust smaller items later.
Think About Flow and Accessibility
A functional layout lets your child move freely and makes cleaning simple.
Things to consider:
- Can they reach everything they use regularly without obstacles?
- Is there enough space for laundry baskets, toys, or sports gear?
- Can you easily vacuum or mop under and around furniture?
- Does the room feel open and airy rather than cramped?
Even small changes, like shifting a cabinet a few inches, can dramatically improve how a room feels.
Work in Zones
If the room serves multiple purposes, consider creating zones.
Bedroom zone ideas:
- Sleep area – bed and bedside essentials
- Study/work area – desk, chair, school supplies
- Play or hobby area – toys, crafts, sports gear
- Storage area – drawers, shelves, bins
This helps your child know where things belong and makes tidying up much easier.
Clean as You Move Things
Every time you move furniture:
- Dust underneath and behind it
- Wipe surfaces revealed during the move
- Sweep or vacuum any areas that were previously blocked
This ensures that nothing is missed with the cleaning, even as things are moved from where they were before.
Add Finishing Touches
Once everything is in its new place:
- Replace only what’s necessary on shelves and surfaces
- Keep walkways and floors mostly clear
- Arrange items so they are easy to grab, use, and put away
Remember: less is more. A simple layout is easier to maintain and looks calmer.
Step 6: Return Only What Belongs

After decluttering, deep cleaning, and rearranging, it’s tempting to just put everything back.
Step 6 is about being intentional with what actually returns to the room. This ensures the space stays functional, calm, and easy to maintain.
Put Back Only What’s Needed
When returning items, focus on utility and daily use.
Things to consider:
- Frequently used items – school supplies, books, favourite toys
- Items that belong in the room – clothes, bedding, personal belongings
- Avoid cluttering surfaces – keep bedside tables, shelves, and desks mostly clear
If an item doesn’t have a clear place or isn’t used regularly, consider storing it elsewhere, donating it, or discarding it.
Organise as You Go
Rather than just shoving things back in drawers or onto shelves, organise them thoughtfully as you go. This is the best chance to find the best home for each item in this new bedroom setup.
- Group like with like – books together, toys in bins, art supplies in one spot
- Keep daily essentials accessible – don’t bury frequently used items in a pile
- Use containers or trays sparingly – just enough to maintain order without overcomplicating
Even small adjustments make the room easier to keep tidy day-to-day.
Check Function Before Finishing
As you return items, ask yourself:
- Is everything easy to reach and use?
- Are walkways and floor space still clear?
- Are surfaces still simple and uncluttered?
🌿 GENTLE REMINDER 🌿
It’s normal if you find a few things don’t have a place yet.
Set them aside in a “maybe” box for another room or future decision.
Step 7: Finish With a Simple Reset
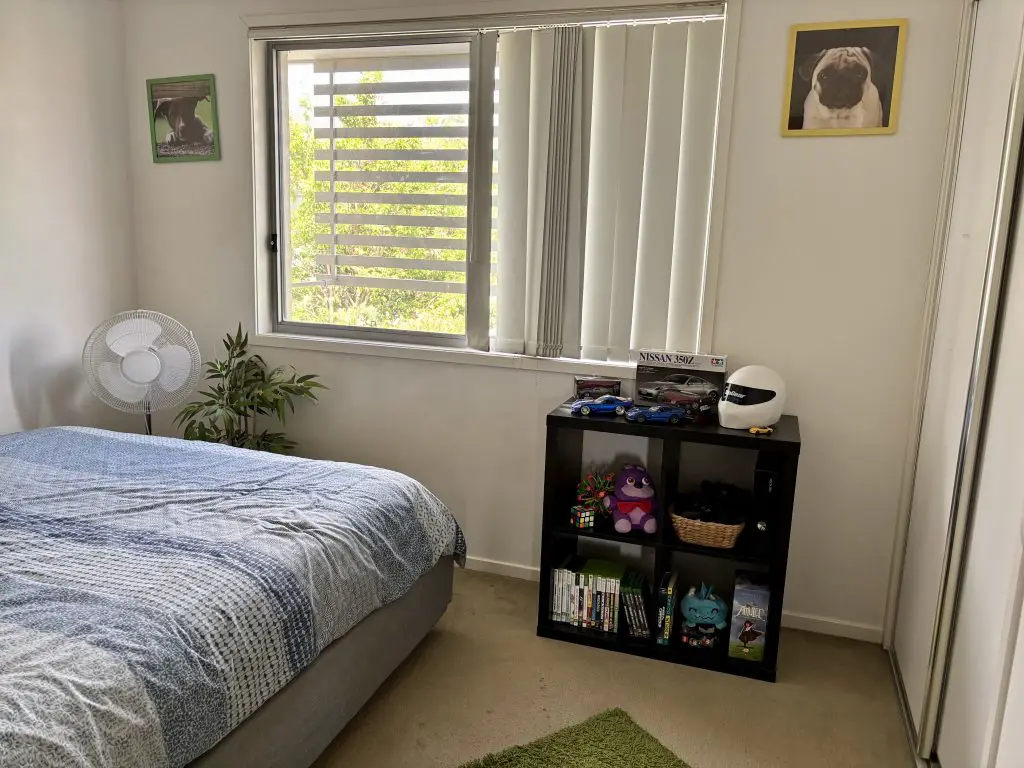
At this stage, the room is decluttered, deep cleaned, rearranged, and only essential items have returned.
Step 7 is all about giving the bedroom a final polish so it feels complete, fresh, and ready for daily use. This is the step that transforms all your hard work into a space that feels calm, organised, and functional.
Make the Bed and Refresh Textiles
A freshly made bed instantly makes a room look calm, relaxed and usable.
This is where you:
- Smooth and tuck in bed linen neatly
- Fluff pillows and straighten blankets or throws
- Replace any clean toys or personal items
- Fold or store away anything washed during the clean
Even small details like a straightened bedspread give the space a sense of completion.
Straighten and Arrange Surfaces
Take a moment to tidy any flat surfaces:
- Align books or décor on shelves
- Straighten desk or bedside items
- Keep surfaces mostly clear — only essential items should remain visible
This simple reset keeps the room visually calm and functional.
Final Sweep of the Floor
A quick floor check ensures everything is in place and also gives that feeling of satisfaction once it’s all said and done.
Before calling it done:
- Vacuum or sweep any remaining areas
- Check under the bed or furniture for missed dust
- Replace bins, laundry baskets, or storage containers in their designated spots
Open Up the Room
Small touches can make a big difference:
- Open curtains or blinds to let in natural light
- Open a window if the weather allows
- Adjust lighting for a cosy feel
These finishing touches help the room feel airy, bright, and ready to be lived in.
🌿 GENTLE REMINDER 🌿
You don’t need every item in a perfect spot or every surface styled.
The goal is a room that feels fresh, calm, and functional, not a display room.
Kid’s Bedroom Declutter & Reset CHECKLIST
| 1. REMOVE | Take out anything that doesn’t belong/ won’t be staying in the room |
| 2. DECLUTTER | Get rid of anything that can go: – ‘Rehome’ – ‘Rubbish / Recycling’ – ‘Donate’ |
| 3. STRIP THE ROOM | Take out rugs & linen for washing/shaking; pull furniture off the walls |
| 4. DEEP CLEAN | Dust, vacuum & clean all surfaces |
| 5. REARRANGE | Put all the furniture & big items into their places |
| 6. ORGANISE | Put all smaller items into place & arrange them |
| 7. RESET | Put linen & rugs back, ensure everything is in place & organised |
More on Decluttering
Pin It