

Setting up a Berkey water filter system isn’t difficult, but the priming and installation stage is where most people get stuck the first time, especially when working with both Black Berkey elements and PF-2 fluoride filters.
This guide walks you through the exact step-by-step process for correctly priming and installing both filter types so your system works properly from the start.
If you’re setting up your full system for the first time, you may also want to follow the complete setup guide below.
Quick Summary: Berkey Filter Setup
Black Berkey Filters:
- Must be primed before installation
- Use a ‘beading’ (outside saturation) method
- Do not overtighten wingnuts
⏰ How long to prime? At least a few minutes per filter.
PF-2 Fluoride Filters:
- Require flushing until water runs clear
- Use a ‘through-flow’ priming method
- Only do 8 turns when installing
⏰ How long to prime? 5–10 minutes per filter.

Black Berkey Elements
The Black Berkey filters are the main filtration stage of your system. They must be properly primed before installation to remove air and activate the filter media.
Step 1: Prime the Black Berkey Filters

Priming removes trapped air from inside the filter and ensures water flows evenly through the filtration media.
Start by removing the washer from the top of the filter stem and attaching the priming tool securely so it sits flush with the top of the thread.
Turn on a gentle stream of water – low pressure is important to avoid splashing and maintain a proper seal.
Press the priming tool firmly against the tap. When done correctly, water will begin to seep evenly through the outside of the filter.
How to Prime the Black Filters:
- Remove the washer from the filter
- Attach the priming tool to the filter thread so it’s flush with the end
- Press it firmly against your tap to create a seal
- Turn the water on gently
- Keep priming until the entire outside of the filter is beading with water
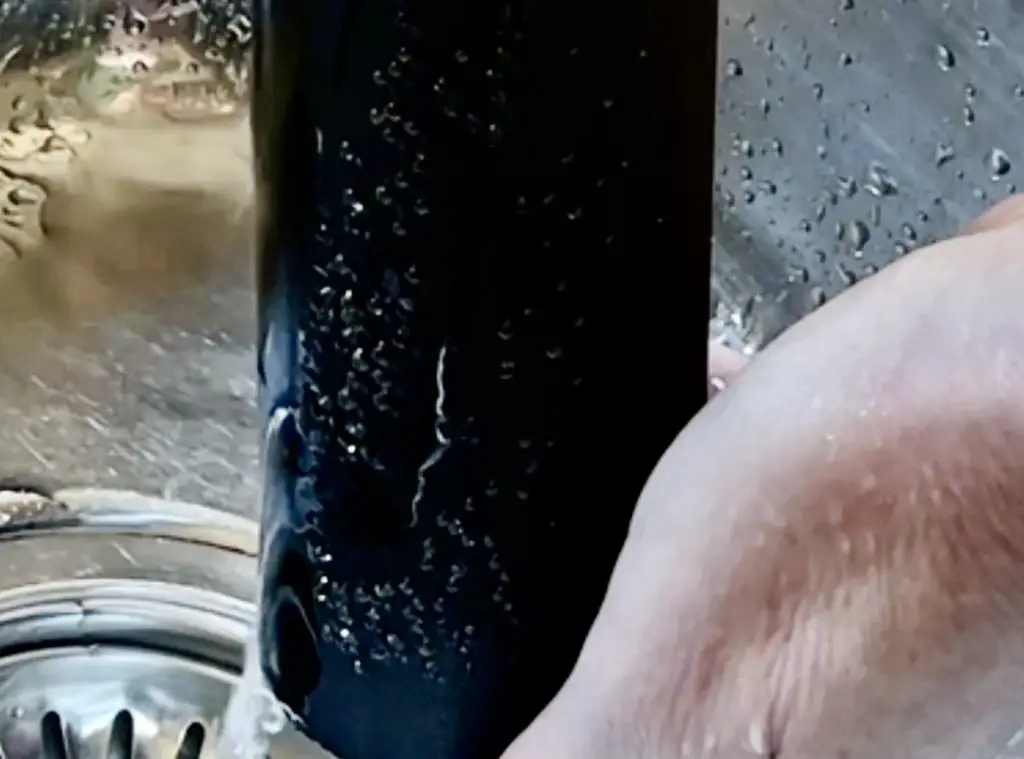
You’ll know it’s working when:
- The filter surface begins to bead with water
- The entire outer layer becomes evenly saturated
Hold the seal until the full filter surface is evenly wet. This ensures internal air pockets are removed and the filter media is fully activated.
Repeat the process for the second Black Berkey filter.
🎥 Watch: Priming the Black Berkey Filters
This video shows exactly what correct priming looks like, including the water-beading effect that confirms the filter is fully activated.
Step 2: Install the Black Berkey Filters
Once primed, the black filters are ready to be installed into the upper chamber.
- Insert each filter stem through the holes in the base of the upper chamber.
- From underneath, place the rubber washer onto the stem & secure it with the wing nut.
- Tighten firmly, but avoid overtightening as this can damage the seal or thread.
- Repeat for the second filter.

Inside the chamber, both filters should sit straight and evenly spaced.
PF-2 Fluoride Filters
The PF-2 fluoride filters provide an additional filtration stage and must be correctly flushed and installed in the right direction.
Step 1: Prepare the PF-2 Filters
Remove the blue washers from both ends of each PF-2 filter. Wash the exterior using warm, soapy water to remove any manufacturing residue.
This step ensures nothing interferes with the priming process.
Step 2: Prime the PF-2 Fluoride Filters
PF-2 filters are primed differently from Black Berkey filters. Instead of water beading on the surface, water must flow through the filter and exit the other side.
Attach the priming tool to one end of the filter and turn on a gentle stream of water. Hold the filter firmly and allow water to pass through it.
How to Prime the Fluoride Filters:
- Sit the priming tool to one end of the filter
- Turn the tap on low
- Hold the tap firmly to the priming too to create a seal
- Run water through the until it flows out the other end
- Flip and repeat with the other end of the filter
- Continue until the water runs clear

You should see:
- Water coming out the bottom through the filter hole
Continue flushing until the water runs clear.
At first, the water may appear slightly cloudy – this is normal. Keep flushing until it becomes clear.
Then flip the filter and repeat the process from the other side to ensure full saturation.
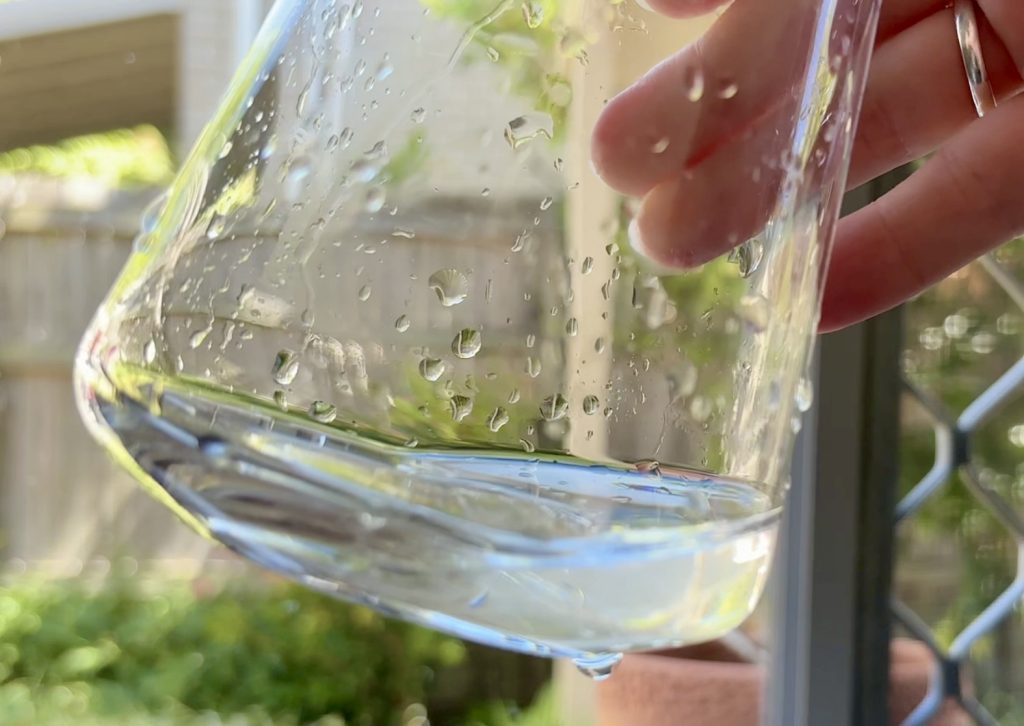
To check if priming is complete, collect a small sample of water in a glass and hold it up to the light. If it still looks murky, continue flushing until it runs clear.
🎥 Watch: Priming the PF-2 Filters
This video demonstrates how water should flow through the PF-2 filter and how to know when it’s fully primed.
Step 3: Install the PF-2 Fluoride Filters
Once fully primed, attach each PF-2 filter to the bottom of a Black Berkey filter stem (the threads poking out of the bottom of the top chamber).
Make sure the arrow on the PF-2 filter is pointing away from the upper chamber, indicating correct flow direction.
Screw gently until secure – around eight turns is recommended.
⚠️ Do not overtighten, as this can damage the connection!

Common Mistakes to Avoid
- Using high water pressure when priming Black filters (prevents proper sealing)
- Not flushing PF-2 filters long enough until water runs clear
- Installing PF-2 filters in the wrong direction (check arrow carefully)
- Overtightening wing nuts or PF-2 threads
- Assuming filters are ready without checking flow or clarity
Avoiding these mistakes ensures optimal filtration performance and prevents issues later on.
Final Check
Before using your system, do a final inspection:
- Black Berkey filters are securely installed
- PF-2 filters are correctly attached & aligned
- Wing nuts are snug but not over-tightened
- All components sit straight inside the chamber
Once everything is in place, your Berkey system is ready to be filled and used.
Final Thoughts
Priming and installing Berkey filters can feel a little technical the first time, especially with the PF-2 fluoride filters, but once you understand the difference between the two priming methods, the process becomes straightforward.
The key is:
- Use low, controlled water pressure
- Ensure full saturation during priming
- Take your time with PF-2 flushing until water runs clear
Once complete, your system will be ready to provide clean, filtered drinking water. Don’t forget to do about 3 flush-throughs of the water before drinking it.
More on Berkeys
Pin It